Tuesday 20 October 2009

A Demonstration of some Animation

And here it is. The finished test animation for the head. It's not an incredibly slick animation, but is a nice example of the things you can do once you've finished with your organic model. To be really honest, animation would probably be more efficient if the maps are added after the animations rather than before. Right now, animating the face creates several major pitfalls in the mapping texture. Nonetheless: Here we are. It's a little bit small, but Enjoy! (For obvious reasons I left the hair out. With each frame taking 1-2 minutes to render with hair, I really did not fancy a 6/8+ hour rendering session!)

That's all for now. Peace out guys

Fun with Animation - A.K.A. Why Morpher and Mapping don't mix

Yeah yeah, I know I finished with the project a few days ago, but everyone was doing animations and my face felt left out. I heard him crying himself to sleep at night. So to make him feel more included, I animated him so that he can join in the fun with the other animations, and even have gave him a set of friends!
Animating the model seemed a pretty daunting prospect. Even the blinking was tenuous enough when I gave it a shot. Having the model blinking frequently (as any human does!) seemed like a ton of work. This is where a trusty old modifier came into play: Morpher
Most of you should remember this from last year, and it's in cases like these that the morpher is invaluable. In order to create a number of different expressions and facial movements, I created several duplicates of the face. They were given plain textures and names to make them easier to identify and work with. You can see them all below:

From left-to-right we have: Blink, Smile, Frown, Shock and Sad. The big advantage with this is that I could always revert back to the 'basic' face when I was finished with an expression. The blinking in paritcular was very handy. I could repeat the blinking so often, and could speed up/slow it down at my leisure... all through the touch of a slider. For those of you who have forgotten how to use morphers, here's a quick run-down:
- Start off by creating a clone of your head. It's recommended you give it a name and new texture to allow you to differentiate it from the others
- With the original head, apply a 'Morpher' modifier above the Turbosmooth (It'll automatically set itself below 'Hair and Fur' if you've added any)
- You should see that the morpher modifier has 'channels'. Below the channels, there's the allocation option, one of which is 'Pick Object from Scene'. Selecting this, and then selecting the desired shape will now apply that shape to the channel. If you now change the number on the right hand said of the specific channel (It goes from 0.0 - 100.0), you will change how much the original goes to match the morpher template
- Selecting subsequent channels allows you to apply different templates, depending on how many different 'morpher templates' you want to use. Just add them all!
- If you ever make any changes to your morpher templates, look just below the list of channels for 'Reload all morph targets', which will automatically update the lot. It's generally easier to do it this way, as you can slowly edit and see how the result looks on the model
- Then simply animate away! When you've done editing the targets, you can hide them so they don't appear in the animation. The morpher will still take effect, even though they're hidden


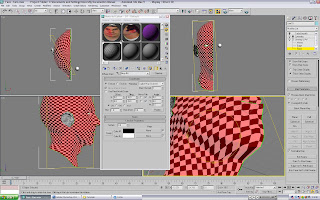
Sadly, animating a finished organic model is not a very co-operative thing to do. The UVW Map is exceptionally temperamental to change, and often, a drastic change will result in the above disaster. For some really odd reason, editing the basic shape causes the 2nd UVW Unwrap to revert back to a single half (Where, if you recall, we made 2 halves and welded them together). As I result, I couldn't do half of the animations I wanted to (I wanted to have myself snoozing and being woken up). Moving the mouth in particular caused to to throw a wobbler. If the lips were parted or closed together, it would pull the crazy effect above 100% of the time. Really frustrating, as it meant that the final animation was restricted in what I could do to it. (Don't even attempt to bow or twist the head) Nonetheless, a few hours later I finished with a relatively simple animation.

Vital Tip: To anyone else who wants to animate their faces, remember: The emotions on your face involve your ENTIRE face. If you find yourself having trouble making your face smile, then it's probably down to the fact that you're just pulling the lips around. If you look in the mirror, a simple smile does a lot of things. Not only does the line of your mouth widen and move into the 'U' shape, but your cheeks bunch up, your cheekbone pushes up beneath your eye, your eyes squint slightly and the skin to the sides of your eyes pinches and pulls most of the side of the face up... and so on. A single emotion carries the entire face with it. So when animating, be sure to move your entire face around (Or at least the cheeks and brow if you move nothing else). Even blinking pulls the cheeks up ever so slightly. I can't recommend enough how handy it is to look at a mirror and keep pulling faces in it. You don't have to be good at animating to get realistic emotions. You just need to pay attention to detail

Sunday 18 October 2009

Assignment Showreel

And this is it! This is what the past few weeks of work has been leading up to:


Looking at the final result, I'm very happy. Considering how it all looked before, I can't help but feel that this is a superb outcome. Sure it doesn't look 100% like me, but it's not Richard O'Brien at least.
Well what can I say! It's been a pretty busy 5 weeks. It wasn't as bad as I first thought. The modelling process was exceptionally practical (Though temperamental and head-against-a-brick-wall inducing on occasions) and a lot less painful than I first thought (I had visions that we would be trying to build the entire face from a sphere or something!). The tutorials were ok for the job, but really could have been a lot more helpful. The tutor had an annoying habit of skipping ahead on some sections. Though I'm aware the plan is to make us use our initiative and work parts out, it was pretty irksome to hear him declare "We'll just jump ahead for a minute" and then have a full head and shoulders on his screen.... dude take it easy, I'm still trying to connect my temples to the skull. That said, the tutorials did the job, and having them there on the hard-drive did make it easier to constantly get reminders.
The topology was easy at the time (Though it came to bite me later on). In hindsight, I can't help but wonder if there is a more efficient way to create strong topology. The tutor mentioned muscle structure of the face, which might have been more handy as a guide than using the creases in the face. (This would ensure that the topology lines flowed in unison with the muscles). But it's all down to personal preference and experience I guess.
The worst part was, quite easily, the initial modelling. Looking at the disaster that first came out is a shining example of it! This part was the most fiddly (Understandably, as you're generating an entire face out of a single plane. You're not building 'upon' anything and don't have any other segments of the 3D model for reference). However, once the initial foundation was in place, attaching the rest of it was considerably easier. Though the nose, lips and eyelids were detailed and required some finesse, they were easier as they were built upon an existing model. Unlike the face, you could tweak the nostrils in relation to the rest of the face. The only other really nasty bit of the face was attaching the ear. It was a horrible process trying to fuse the 2 sections together.
The UVW Mapping was merely a lengthy process. In terms of difficulty, it was one of the more leisurely parts of the process. I'm confident in photoshop and the model was 'safe' as I was only working on its mapping. It took several hours, but was a fairly gentle process. Hair & Fur was a bit messy, but again not exceptionally taxing.
The only main problem I have now is a severe aversion to organic modelling. Give me animating robots any day... anything organic is too nasty. I'm also finding my enthusiasm for 3D disappearing: In previous years, completion has always felt like an achievement, very much "Yes! I have completed this! It feels fantastic!". This time round it's very much a "Thank God I have got that out of the way now." It's more a drained feeling than one of ecstasy, which isn't a good sign vocationally speaking. It'll be interesting to see what happens with the next assignment, whether this is merely a 'speed bump' or sign that this really isn't my ideal field of work.

As you can probably guess... I'm glad to see the back of this one. (Sorry, had to slip that pun in there)

Finishing Touches - Hair Styling

Time to finish this stuff off... Though the previous result had a passable resemblance, I can't help but feel that the hair was too far from my own. It was far too flat at the front. For whatever reason, my hair has a cow's lick one one side, and the other shoots off in its own direction. Translation: the front does its own thing. In lieu of this, I decided to try and tweak it using the 'Hair Style' tool. It's quite nasty, but once you get the hang of it; can create some nice, simple basic effects.

Basically, when you select 'Style Hair', you get a cylinder (and funky orange hair!). The way it works is that when you click and hold the LMB (Left Mouse Button), it 'grabs' all of the hair vertices within it. Moving the brush then moves these vertices (and only these) in it's direction. The first main tip is to shrink the brush size. It's found on a slider (Unhelpfully without a label!) beneath the 'Style Hair' button and work from the front/left/right/back/top views. Working from perspective just creates really odd angles and you can find areas of your hair flying off in odd directions. It's also a good idea to work with small bits of hair first while you get the ropes. Click the LMB when the outer rim of the cylinder intercepts the hair a few mm from the tip. Slowly move the tips around, and then start to work from further down the hair. It's also a lot easier to raise hair up after flattening it, rather than trying to flatten 'popped' hair... so it's always a good idea to 'recomb' (flatten) it first, before working on it (Even if your hair sticks up). Work slowly and the Hair Styler should co-operate.

This is me if I lived in the 60's. You can start to see the style coming along here. The rest of the hair is flat (Due to the 'recomb' from last time), but the front is being lifted and moved about. In this example, I played with the tips of the hair from the 'Left' viewport, and the roots from 'Front'. This allowed me to have full control over which hair was moved and where it was moved to.

This is it around mid-way through. It's definitely in the right direction with regards to consistency and general style. Only problem at the moment is that the flat fringe has gone completely sideways. My wonky hair hasn't been incorporated at all!
This is more like it. A lot of playing about with the roots gave the final result, shown here. The hair now actually has a cow's lick, and the other side 'slopes' down as it needs to. I also reduced the root and tip sizes slightly (5 and 3 respectively), as the hair was looking a bit too dense.

Tuesday 13 October 2009

Finishing Touches - Adding Hair

It's times like this that I'm so glad I have short hair (Short to the point where it's impossible for it to get messy). With the rest of the head completed, it seemed bad practise not to do the hair. (My hair isn't short enough that I could get away with a map of the hair). Special thanks here to Dan Jackson whose speedy 3DS Max'ing meant that he got to play around with the hair for a while and pass on his excellent advice to the rest of us. My friend, you saved me a lot of time and I am exceptionally grateful!
The hair was added by going to 'Modifiers' and selecting 'Hair and Fur'. Sadly, this places it all over your face (For a cheap laugh, hit render when this happens. You know you want to!). The first step is, of course, to limit the hair to where you want it. Firstly, under the 'hair and fur' modifier section on the right, select 'faces', and make sure the 'paintbrush' select option is enabled (Change the dotted box on the top toolbar to the circular moving one, remember?). Then simply paint the area you want! You can add more faces by holding Ctrl, and remove them with Alt. When you're happy with the selection, hit 'update selection' on the modifier panel on the right. Then it's all about playing with the settings. Top Tip from Dan: If you're hair is flat and short, you can save a ton of time when clicking 'style', by going down to 'Pop Selected' (Which stands all hair on end) and then clicking 'Recomb' (which brushes it flat)... thus taking care of the style! (Brush is horrible to use and only advisable for actual hair stylists)
The changes I made to the hair specs so far are:
- Hair Count - 50,000 (from 15,000)
- Hair Passes - 3 (from 1)
- Cut Length - 10 (from far too long)
- Rand Scale - 0 (from 40)
- Root Thick - 7
- Tip Thick - 5 (My hair is pretty thick)
Needless to say, the hair colour was also changed to a nice strong black (Or really really dark brown).

And there we go! And the addition of hair has not made me look any less of a Roman (In fact I'd say it's made it worse!) But there we have it... My virtual self in 3D. This isn't the last of me just yet though... I still have a few more tweaks and adjustments to make (Mainly with the hair and lighting). Watch this space...

Bump / Specular Mapping

Almost... now for some finishing touches...

The first step in the finishing process was to apply a 'bump' map. This lovely little tool allows the texture to have a little bit of depth to it (Rather than attempting to feign texture by a pretty pattern). The above image is the bump map. This was created from the map guide I used for the face. It's pretty easy to do. All you need to do is 'Desaturate' the original image (Make this a copy of course! You don't want to accidentaly overwrite your texture map!) and then run 'High Pass' through it (Found under 'filters' -> 'other')

Now, applying the bump... First step is to go to the material editor for the skin. Making sure you're in the 'parent' (Not the UV Map, but the material editor with options like specular level and so forth) scroll down to 'Maps' where you now have a large list of different custom maps to use. Under 'bump', you can add the new texture. In addition: under the bitmap options for the texture should be a large box labelled 'bitmap' in the top right. When selected, you're given the list of bitmaps again: one of which should be 'mix'. This allows you to blend textures. So in addition to the bump map, it's also a good move to add 'noise' to the second box (Thus helping to create the effect of skin pores or a stubble). The value below shows how much of a mix you're making. 100% didn't work for me, as they almost seemed to cancel each other out (80 worked better, and 50 was too rough)

Now, it's a subtle difference, but it's there. The skin now has a slight roughness to it, particularly around the stubble area. The light catches it well and it's a little bit more prominent. It's probably only noticeable on a 19'' screen though...

The final step (on the tutorials at least) was to add the specular map to the scene. Specular maps basically tell the program what areas are shiny and what aren't. To be fair, in hindsight, Oran-Nayer Blinn does a better job of realistic texture when it comes to light. But I decided to give this method a spin. The above map was made using the bump map from before (Again, edit a copy, not the original!), and changing the 'levels' option to make sure that the background was pretty much completely black (Open 'Levels' and drag the slider on the far left). It was then simply a case of using the brush tool (Turn hardiness down to 0% and also turn down opacity) to draw out the key areas which reflect light. Once done, it was blasted with a quick Gaussian Blur and 'Texturizer' (To add a bit of roughness to it). In the same way the bump was added; we throw in the texture on the 'Specular Levels' part of 'Maps' and...

There we go! I look a bit bronze though. What's even more worrying is that I look vaguely Roman... give me a toga and I'll fit right in... Seriously, I could have sworn I saw that guy in Gladiator...

Adding the Texture

It was finally time to take the checked pattern and turn into something that looks vaguely humanoid

With the unwrapped UVW map we had before, I made a few alterations to it for Photoshop. The main thing is that I scaled it so that it fit cleanly within the bitmap pattern (Inside the blue box). The second part was to alter the aspect ratio (To get the ideal surface to work on). The tutorial stretched it 2 : 1 (Length - height respectively), but that seemed too stretched for my mask. As I would be using snippets of my face, the more that the centre looked 'normal', the better for me. So personally, I found that a ratio of 3 : 2 worked better (The length is x1.5 the height). Taking this and saving it as a jpeg ('Render UVW Template' and click the disc icon), this was sent to photoshop for working on.


What we needed for the guide was the entire gridlines on the top-most layer, but nothing else (That way, you can see through the black areas as you added more, but the top guidelines would still remain visible and on top. Opening the image guide in Photoshop, select the entire image it and copy (Ctrl + A, then either select 'copy' or hit Ctrl + C). Then create a new layer and fill it with a nice bold colour (Preferably one that doesn't come up on your face, such as blue). Then, with the 'blue' layer selected, click the 'Quick Mask' Button on the left-hand set of tools (It's a small box with a circle in near the colour selector). With this enabled, paste the image onto the layer. It should be all pinkish red with blue lines (That's good!). With this, disable 'quick mask' mode and you should have the lines all selected. Now keeping them selected, go over to the bottom right and click 'Add Layer Mask'. This should take your selection and convert it into a mask. And there we go! One guide for the face modelling. Then, to make a space for the face, create a few new layers in between the map and the guide.

Creating the face is then simply a case of chopping and pasting bits of your face onto the document. Every time you save, be sure to disable the 'guide' layer (Otherwise your face and the detail will be covered in blue lines). I used to 2 reference photos (The ones used for the topology) to provide the necessary details. To begin with, I started work with the portrait photo, and selecting the desired area with the lasso, simply dragged the selection out of the original photo and into the map. It's basically like a jig-saw or collage. Luckily, the map was the right shape (The 3 : 2 ratio) so that I barely had to tweak any of the sections I imported. They were all roughly the correct shape and size, which really made life a lot easier

Bit by bit, more was added to the face. The majority of the front was complete, and it was time to start using the profile reference to work in the hair and side burns (What little I have...). It's very rough, and doesn't need to look good yet. Even if the components don't match in tone or obviously overlap, it's fine and will get taken care of later. The vital point here is to get all the essential pieces together in roughly the right place. The 'Warp' tool is also highly valuable here. If you have gaps or slightly off-centre pieces, you can use the warp tool to pull and tweak them, in order to help them fill some gaps.

This is a snap of the map about halfway through, and as you can see, it doesn't need to be neat. It's basically like those old collages you did at school where you had to cut out bits of photographs and stick them together to make a face (Was I the only one who did that?). For the majority of it, you can pretty much see the portrait references in the centre, with the hair and cheeks of the profile shots on the flanks

The next main step was to take care of the ears. Luckily, the entire inner ear shape fit perfectly on the map (albeit after a 90 degree rotation clockwise), and a few tweaks meant that the main part of it was showing. From here, I was pretty much complete with the cutting-and-sticking, and was ready to start fine-tuning and cleaning it up.

This is what the finished map looks like. The main thing to do when happy with the outcome is to merge all the layers together (Except the guide and lower map of course) and begin to clean up. The 'patch' and 'clone' tools were invaluable here and saved a massive amount of time. The 'clone' stamp is the best for filling gaps. Selecting an area to work from, it paints a copy where you desire, allowing you to use parts of the skin to fill gaps in the map (For example, there were gaps around the temples. Using the skin as a guide for the clone stamp, I was able to plug this gap). However, for life-saving use, the prize goes to the 'Patch' tool. I don't know how it does it, but using an area as a guide (much like the clone stamp), it tries to blend the selected area as smoothly as it can. Rough 'connecting' edges on the map can easily be dealt with a patch tool on the edges. Luckily, I've used photoshop quite a lot, so this part didn't take long to do at all...

And here's what it looks like applied! I was very happy to see this result. Not only does it look pretty good, but it also looks less like Richard O'Brien. Of course, something was missing!

That's more like it! The eye texture was found off Google. It was, however, the wrong colour and the pupil was too small. So a bit of messing around with the Hue/Saturation and colour balance gave it a more brown tint (My eyes are really crazy... they're a constantly changing blend of brown and green, with the odd hint of dusty blue around the pupils), and a larger paint brush allowed a clean pupil to be placed in the centre. Nearly there...

Fun with UVW Mapping

WARNING: The following post contains images of a checked-pattern nature. Staring too long at the images might make your eyes go funny

Before the mapping can be reworked to allow a custom texture to be placed onto it, the first step is to kick start an 'Unwrap UVW' in the modifier port just above the edit poly modifier: It's important for the unwrap to be below the 'symmetry' and 'turbosmooth' modifiers. On the mini drop-down menu on the Unwrap UVW (The little black box with the '+' sign), select 'faces' and then change the selection to 'paint' (Top toolbar, the square with dotted lines around it. Left click and hold, then go down to the bottom one: A moving circle with dotted lines around it). Then it's simply a case of painting the entire head except the ear (The ear is handled separately as it's a complicated shape). Careful attention needs to be paid to this bit, as missing out a single face can ruin the map). With this done, 'cylinder' is selected in the modifier panel (Applying a cylindrical style map to the head) and is subsequently aligned so that it is vertical and the curved face goes around the front and back of the head ('Align Y' should do it). From here, it was a simple case of moving and rescaling the new cylindrical guide so that it was centred in the middle and contained the entire head (Including both sides) within it. From here, we slap on a 'checkered' pattern to get an idea of how everything was held together...


As you can see in the above images, the squares are stretched on the top of the head and under the chin. Other than that, the squares are actually quite even over the rest of the head, which is a very good sign! Even over troublesome places like around the eyes and nose, it's very consistent. This means that very little will need editing.

Clicking the large 'Edit' button in the modifier panel takes us here. Clicking the little triangle under the image and to the right removes unselected faces, which basically removes the ear from the picture. It's also important to deselect 'tile bitmap' and enable 'constant update' if they aren't done so already. This mesh of white lines is the map, and is a 2D rendition of how the texture is applied to the face. Each quad on the image is one of the faces on the finished model. From here, you can see why the top and the chin are so stretched: what is meant to be a small quad is an incredibly stretched rectangle. Time to fix it!

Starting with the top of the head, the troublesome vertices were all selected (As well as a few neighbouring ones to ensure that any changes create an even transition to the original pattern), and then under 'Tools', the 'relax' tool was selected. What this little beauty does is space out the selected vertices from each other (depending on the parameters you give it). It also helps to even them out to create a consistent spread of the pattern. Now that's a time-saver! Making sure that 'relax by edge angles' was enabled, I simply 'hit' apply and that was pretty much it. The top of the head was suddenly evened out. There were a few stray stretches, but that was tackled manually by selecting the vertex and moving it around myself. The same was applied to the chin. All taken care of in under a minute. Nice.

As you can see here, the nose was a bit of a mess. Many of the faces were overlapping, or were twisted in such a way that the pattern was inverted onto the back of the mesh. Both of these are undesirable and need removing. (You can locate any of these under the 'select' option). Luckily this was made easy with the relax tool again. This time, the mode was 'relax by centres', which basically moves them so they do not overlap. One click and the nose was fixed instantly. Now that's awesome!

A few more tweaks later, and this is the finished result. All spaced and all even. Now for the ear!

As before, the desired selection was highlighted with the brush tool. Luckily, the green lines of the previous map were still present (Which are basically the edges of the map), so it was easy to find which parts have been mapped and which weren't. Note to others: Take great care to select every bit of the ear, as it's easy to miss out a hidden face or 2. When you click the 'edit' panel, make sure you deselect the 'hide unselected' and look for any ear faces unselected. If one comes up, go back and find it. With the selection complete, we start with the 'planar' map, which is set so that it forms a nice square around the ear (You might need to hit align if it faces the wrong way. Again: Y worked for me)

With the plane now in the right place, the next step was to select 'pelt'. This map is great for complicated structures which have a lot of overlapping parts and grooves. What it basically does is pull out the map, stretching all the edges out, hopefully spreading them all apart and removing any overlapping/inverted faces. However, in its current form, it'd be hard to stretch out the ear map properly. So before it's pulled, it's a good idea to create a 'seam' or 2 (It allows the edges to be pulled apart). I followed the tutorial, which suggests one behind the ear, shown above, and it was sufficient for the job.

This is what the pelt looks like. You can find this by clicking 'Edit Pelt Map'. Despite a large number of options, all you need to do is use the 'scale' and 'rotate' tool on the pelt handles (The vertices on the outside blue ring), just to make sure you have a lot of space and that the majority of the lines are straight (You ideally don't want the red/grey lines pulling the edges out at an angle). All you do then is hit 'Simulate Pelt Pulling' and...

There we go! All done. You might need to use the 'relax' tool and simulate pulling a few more times (You can keep pulling the mesh if you're not happy with the first result)

And there we go! A pretty consistent pattern if you ask me. Aside from a few stretched bits in the centre, the rest of it has come out very cleanly

We finish by going into 'Edit' mode again, and removing any inverted/overlapping faces. We also place the ear on a suitable space in the pattern (There's probably a nice bit of room in the corner under the place where the neck curves round). Rescale it down and hide it there. Result! Now to mirror it...

Going back up a step and applying the 'Symmetry' modifier, we apply another 'Unwrap UVW' modifier to the head (But still keeping it below the 'turbosmooth'). Opening edit mode again, we have the same mesh as before... only now everything has been cloned (What's happening here is that the other half is using the exact same references, meaning it's in the exact same place). Enabling 'select element', we select the main face until we get the left side of the face (You can see it selected in the viewport). Once selected, mirror it and move it to the other side, placing it so that it just about touches the original (To help accuracy: Left click and hold over the 'move' button and select the one that's just left-right, which ensures that the second map stays perfectly level with the first). Do the same for the left ear

The final step is simply to connect the central line of vertices together! Match each vertex on the central line with it's counterpart on the other side, and selecting both: Hit 'Ctrl + W' to weld them together. If they're slightly off centre due to the 'relax' tool earlier, just move them closer and weld them. With the 2 sides welded together, we now have a full mesh that we can work with in Photoshop to build the texture!

Will you start the fans PLEASE!

Next step was the dreaded facial addition, more commonly known to normal folk as the ear. Obviously when God was building the world, he either did not envisage students using 3DS Max or just had a really cruel sense of humour. Nonetheless, it's clear to say that his version of 3DS Max far supersedes the one we currently have.

The start of the ear was a walk back down memory lane, into the wonderful world of topology. As before, the key was to find the main creases/grooves/bumps and highlight them in blue, following that up by drawing in sets of quads in red, using the aforementioned blues as a guide. Pretty straightforward stuff by now. And just like before, the next step was to create the quads in 3DS Max with 'line' tool and having enabled 'snap' for the vertex. The splines were then united into one with the 'attach' option, and all the overlapping vertices welded together so that they move as one. To be honest, the next step was basically trial and error. Being a small and relatively flat shape, it's hard to get a solid reference for the ear shape (The portrait shot can only help so much. It's like the eye socket in the profile picture. You can get a vague idea, but it's not ideal). You can quickly find obvious contours around the edges and where the 'flap' overlaps the ear canal, but other than that, you're better off guessing and constantly adjusting, using any spare pictures of yourself to get an idea of what parts go where. Below is a screenshot from about halfway through the modelling.
Not where near perfect, but getting there. A small section of the top and side of the ear was extruded slightly to allow the ear to have some depth to it. From this stage, it was simply a case of going through old photos (That had some stronger, clearer angles of the ear) and working out where the bumps where, and how far they stuck out.

This stage was just nasty. Attaching the ear to the head took several (failed) attempts before I finally managed to crack it. There were 2 large problems here: 1. The tutorials failed to mention that when modelling the ear, it helps to try and keep the number of quads similar to what you have on the side of the head. I had 20+ vertices to try and connect up to 10. 2. Extruding only part of the ear meant that it was difficult to get a smooth connection between the head and ear, as there would normally be a few messy gaps. After a few failed attempts, I deleted the extruded faces and started with the 'flat' ear again (As in it had no depth. The shape and grooves/bumps were still present) and this time extruded it all out as one. This now meant that all the edges linked nicely. The next step took a page from the nostrils/lips, and selecting all the outer edges: used the 'scale' tool inwards whilst holding shift: Thereby creating a nice new set of inward pointing faces, again with all the edges linked up nicely. From here, I counted the amount of vertices that I needed to connect the ear up to, and subsequently made the exact same number from the new faces. Basically, The numerous faces once again gave me 20+ vertices to join. However, this time I could join neighbouring vertices to each other: So 2 neighbouring would create 1, thereby cutting down the number. It was simply a case of bunching up the vertices until I had 10 left, all connected cleanly to each other (No overlapping parts). As always, after joining it to the head, it was attached and the connecting vertices welded. After a bit of tweaking and tucking the occasional vertex away, I ended up with what you see below.

Hmm... I like it but I can't help but ponder how much that looks like Richard O'Brien, none other than the face of 'The Crystal Maze' which made a strong part of my childhood. It makes me want to take out my harmonica and set people some mental/physical/skill/mystery challenges. My mother has some explaining to do... until then: "WILL YOU START THE FANS PLEASE!"

Saturday 10 October 2009

Creating the back of the head

Alas this was one of those cases when a bit of mindless playing about in 3DS Max leads to some pretty sweet results. As a result, the screenshots for this section are somewhat low in number. In a bid to "try a few things out" in a spare 20 minutes to try and get the hang of what to expect for the next phase, I ended up creating the back of the head! The process holds a lot of the same principles as the spline modelling of the face (Topology and using quads to create a smooth surface). Only this time, we would shave off a lot of the time and effort off by using a sphere as a base. Using it as a basic shape meant that the majority of the natural curves and quads were taken care of, thus making my job a lot easier!
I started off with the sphere, and using the 2 pictures as a guide, moved and rescaled it so that it comfortably fit the shape of my head (As well as changing the overall size, you'll also probably need to scale it in single directions to squash or stretch the ball shape into more of an oval shape). With the finished ball, it was then a case of removing the faces which weren't useful. As the front of the face is complete, the batch of faces nearest that would not be required, nor would those on the bottom of the head, as that needs to lead to the neck. In addition, the ones of the side of the face were removed, due to the fact that most of the faces pulled in to a single vertex, creating a large number of triangles (And would subsequently create an annoying pinch). This left a 'cap' that basically covered the top and back of the skull. From here, we could begin:
With the base now ready, the first step was the join the 'cap' to the tips of the finished face. Enabling the 'snap' tool, the edge vertices of the tip of the 'cap' were pulled and joined to the top of the face mesh. With this complete, the next step was simply to fill in the gaps at the side of the head (Around where the ears are). The finished form is above, however, you can see the mesh with the quads in the image below. The majority of these quads were taken from from the initial sphere shape. Instead of pulling out new quads, I used the majority of the ones already present, and just moved them lower down the head (Whilst ensuring I kept a smooth line of quads). A couple were created to fill the occasional gap, but the majority of the side of the head you see is from the initial sphere. To be honest, I ignored most of the head topology that was drawn in beforehand, and worked more on looking how the edges of this part flowed. At the time, this was simply me messing around to see how the head might connect to the face... it wasn't intended to be the 'official' construction. Of course that was before I saw it click together quite nicely! Once the side of the head was all connected up with the face mesh, the 2 segments were attached to each other (The face was selected and 'attach' was selected, followed by the selection of the skull), and vertices all welded (To ensure the connecting vertices moved as one). With the back of the head completed above, it was then time to work in the neck and the chin.

Fortunately, with the top of the head completed, it was easy to create the quads for the neck. Before I did this, I pulled out a single set of faces from the chin (Using the entire set of edges from the chin that weren't connected up to the back of the head). This allowed me to at least have a chin! (If the neck quads were pulled straight down from the tip of the chin, my entire head would be one with my neck). These faces were tucked under the chin leading to the neck (The darker line of quads under my jawline in the above image) and any linking vertices welded where necessary. From here, I now had a perfect neck shape from the edges. I was quite literally able to select all the edges on the tip hole where the neck would be, and drag down a new set of faces (Move + shift key, remember?). I performed this a few times to get a nice batch of faces to modify round the contours of my neck (As opposed to a simple face that would create a very flat cylinder/cone shape). In particular, I needed a nice set of faces around the area where my Adam's Apple resides. The cluster of vertices allowed me to pull out a small notch at the front. As for the rest of the neck, I struck pretty lucky!


If you look at the neck (particularly on the side view), it looks as if there are veins/muscles in it. I will admit that this was a simply a superb and lucky coincidence! When I first pulled all the faces down for the neck and spaced them out to form the initial contours of my torso, a few uneven vertices meant that slight 'tubes' emerged from a single edge vertical sticking out a little bit more prominently than the others. This immediately created the illusion of veins/muscles, and were subsequently kept for obvious reasons!

Additional Touches - Eyelids

The eyelids were created much in the same way as the lips. Much like its predecessor, the trick was to pull out, from the eye socket, an additional set of faces to work with. With the outer edges of the sockets selected, a new set were dragged out by using the 'scale' tool along with the shift key. This was performed thrice, in order to create 3 new sets of faces to work with. (The first set to pull back into the eye socket, thus creating the crease between the socket and eyelid. The second to pull out the eyelid, and the third to tuck it back into itself and round off the edge to the second)

In addition, I created a pair of eyeballs (Nothing more than 2 white spheres) to use as reference guides for the creation of the eyelids. After all, having the eyeballs in place allowed me to model the eyelids around them, thus creating a more 'snug fit' and realistic shape. The next 10 minutes or so were literally then a simple case of pulling the vertices around the eyeball. With turbosmooth enabled, I was able to see the finished result and how it held the eyeball, and make the necessary adjustments from there. It took a while to even everything out (Some parts of the eyelid were coming out fatter than other parts), but after a little while of playing about, I ended up with something that looked a little bit like this:


Saturday 3 October 2009

Creating the Lips

Time to get started with the lips! I notice that I missed some of the early phases of the nasal construction: The techniques will be included here.

The first step of the lips (This applied to the nostrils too) was to select the edges leading into the lips (In this case, all of them) and pull them out using the 'scale' tool, whilst holding down 'shift'. This created several new faces/vertices to work with, as you can see in the image above.


The next step was the start pulling the new faces into shape. What also proved handy was the 'connect' tool. It acts as a 'cut' tool, but is more precise and faster (Depending on what you want). To use this; select the edges leading to the edge of the lips (The 'sides' of the new faces, not the original side and the one that acts as the new edge of the lips). The connect tool simply cuts a new line (or more) through them... basically splitting each new face into 2 smaller faces, allowing for greater manipulation. Nice! With these, it was then a case of pulling them into a rough lip shape (Turning the mesh 'see-through' and using your picture in the background is highly recommended)

With a quick blast of turbosmooth, it was time to see the results. Already a promising start! The corners of the mouth pinch slightly (Due to the edges all coming into a high concentration of vertices) and the lips are not prominent enough yet, it's definitely promising! Notice that I left a slight gap between the lips (After all, I might want the mouth to open if things work out nicely!)

A few more tweaks later and I was able to puff out the lips a bit more and clean up more of the edges. I even worked in a slight smile to it!

And here is where I am now! I'm incredibly happy with it! Considering what it looked like just over 24 hours ago, I'm relieved that it's starting to take shape. There's still bumps and tweaks here and there, but as whole, it's on the right track. My only critique is that it looks less like me and more like Sonny from iRobot... hmm...